Photo App guide/Specification

Myphotogenie is a service that allows users, primarily estate agents, to upload images of properties for image manipulation, the splicing of video files, and also the creation of property floorplans.

This guide will describe in detail the user process for the Myphotogenie photo app, and the backend functionality, to include these steps:

Summary.

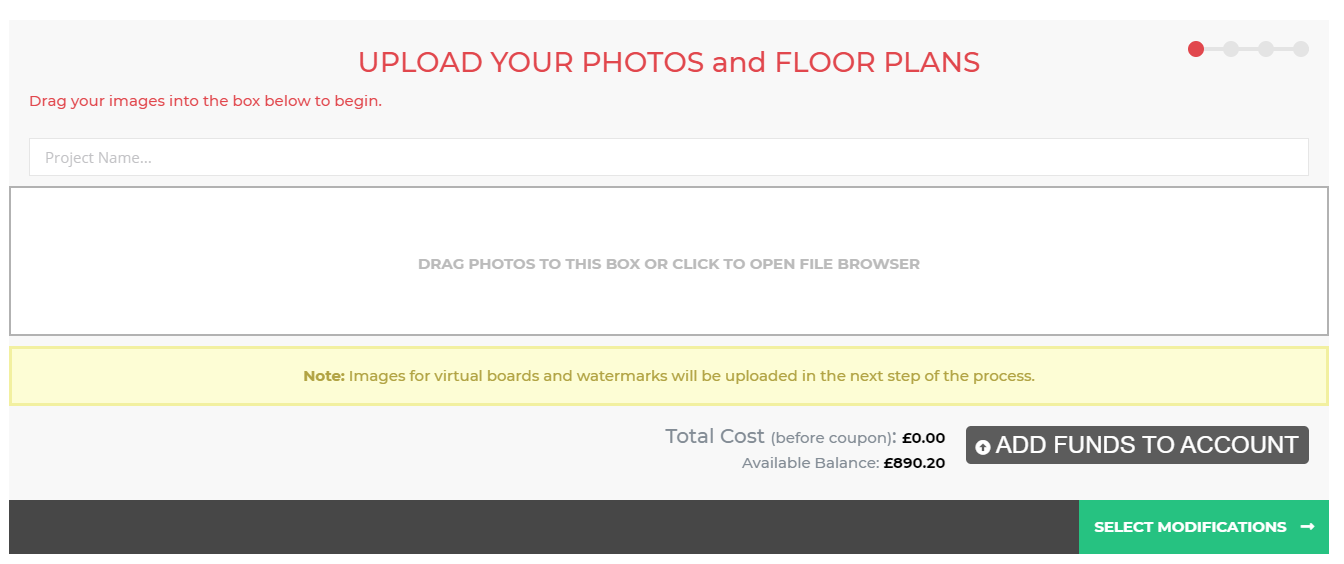
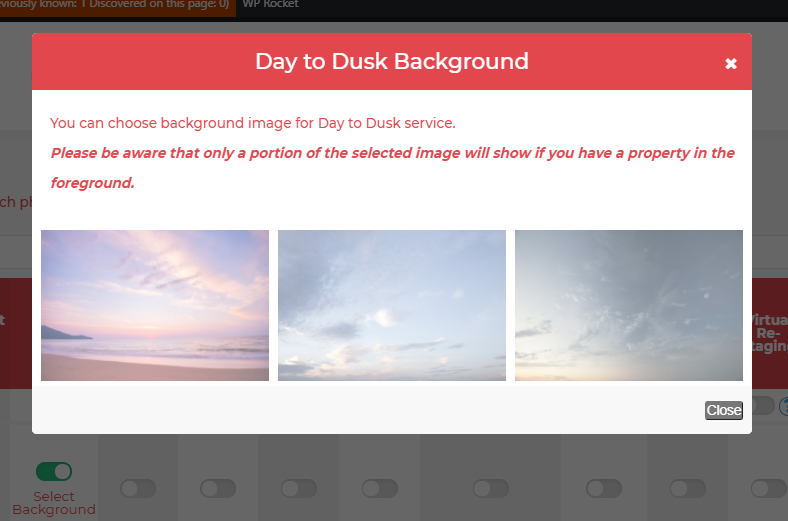
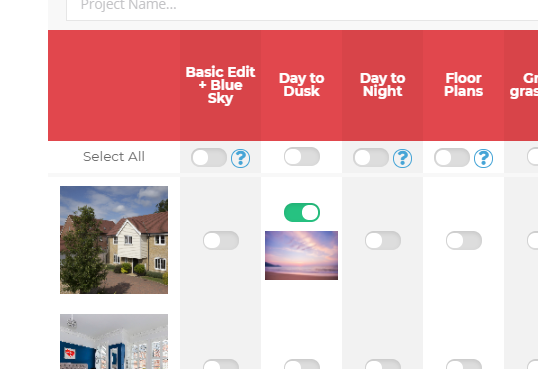
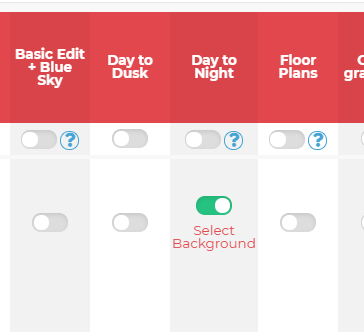
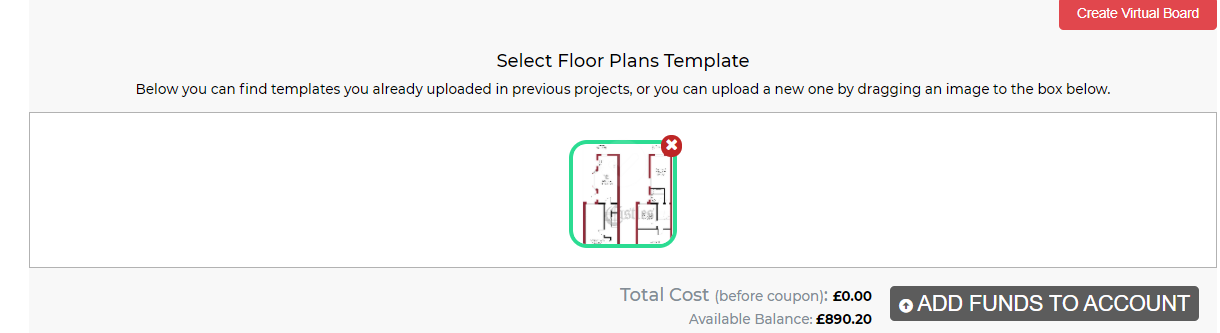
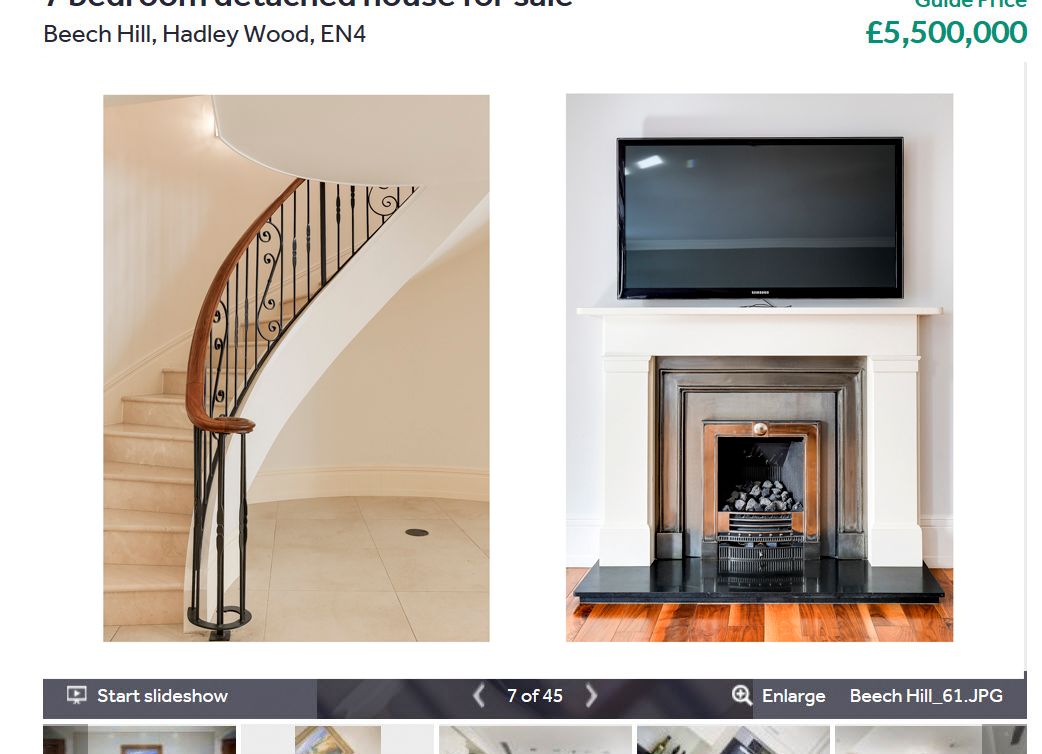
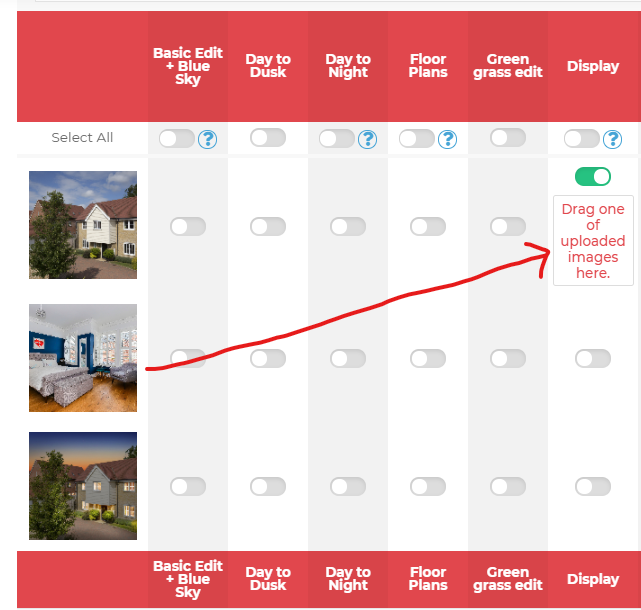
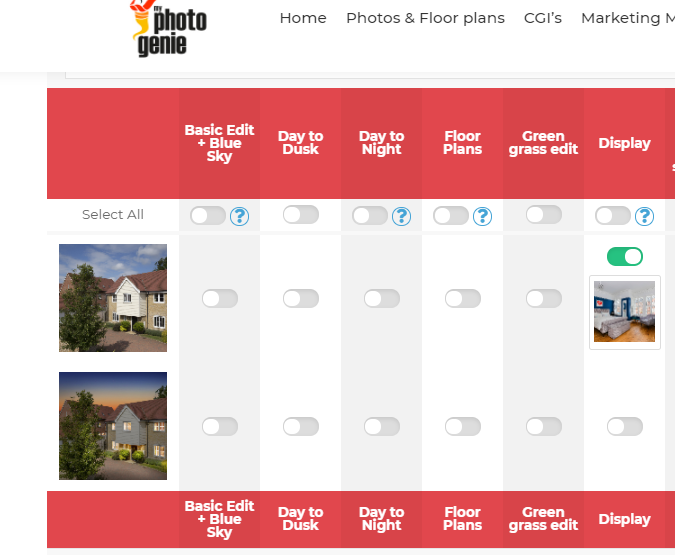
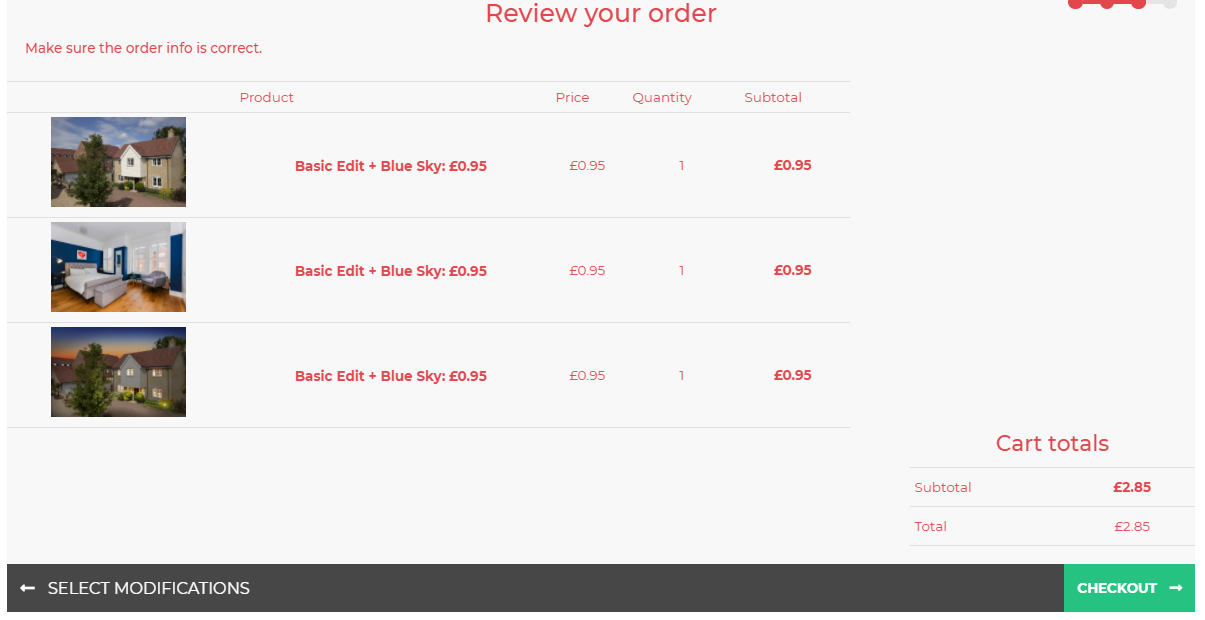
  1.  User upload of images and/or video and selection of modifications in modification selection screen  – new project creation
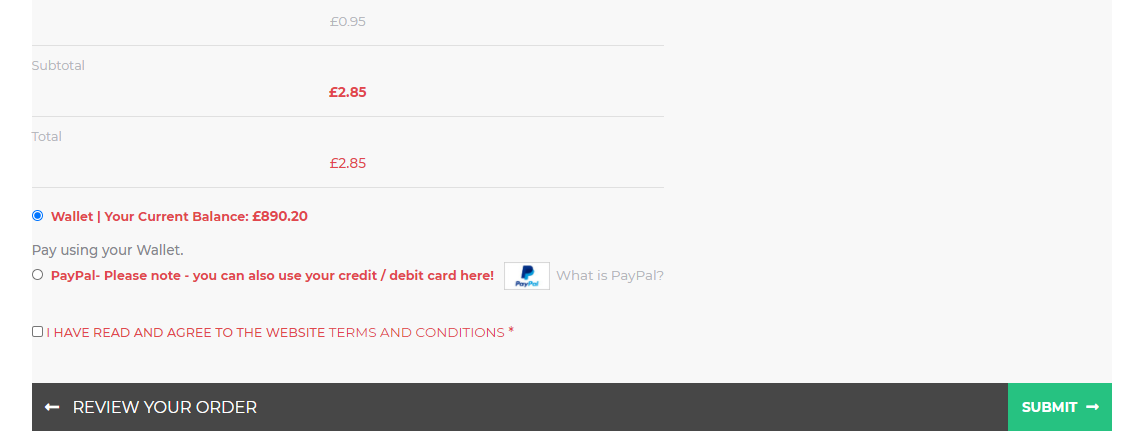
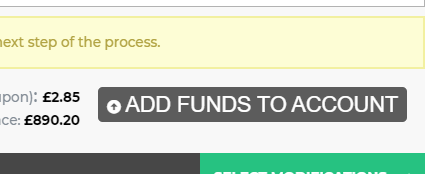
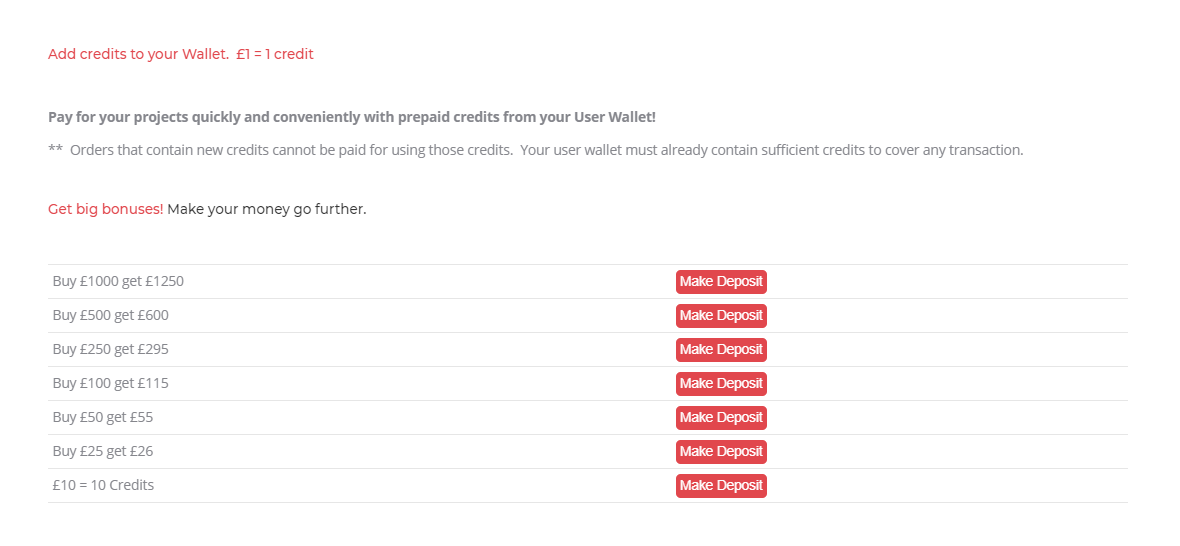
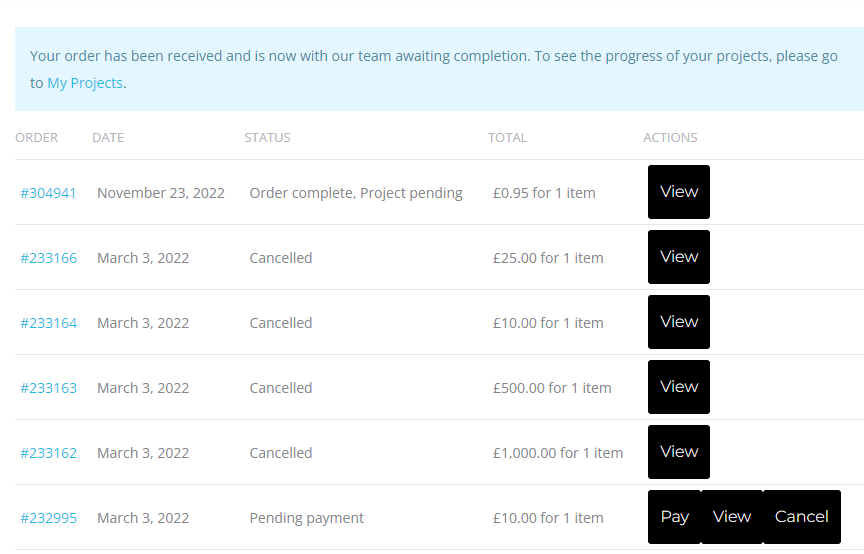
  2.  Payment process (Either by Paypal/Epay or by User Wallet which users can ‘top up’ with credits)
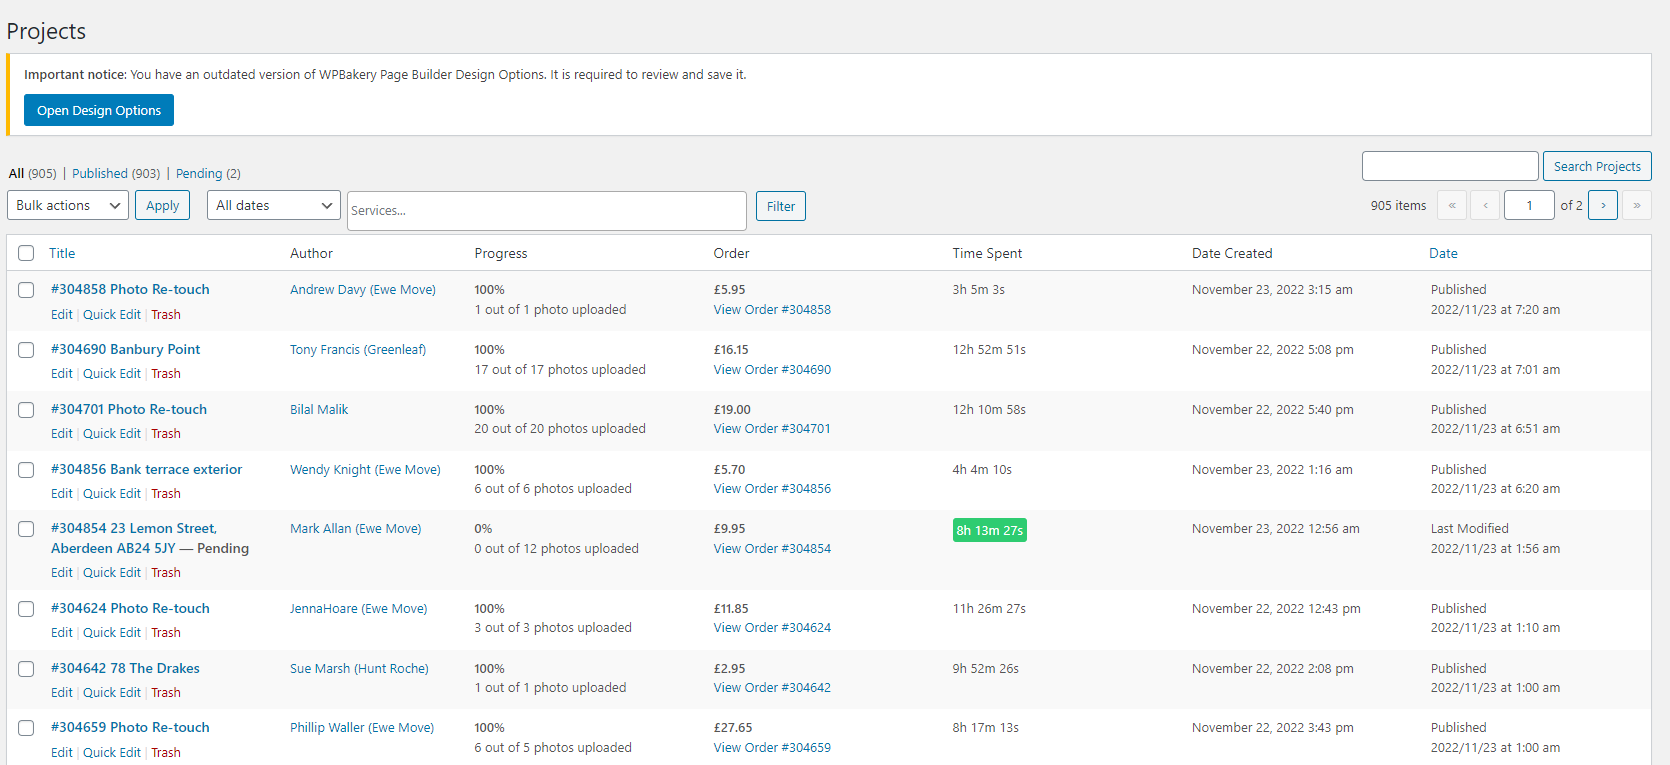
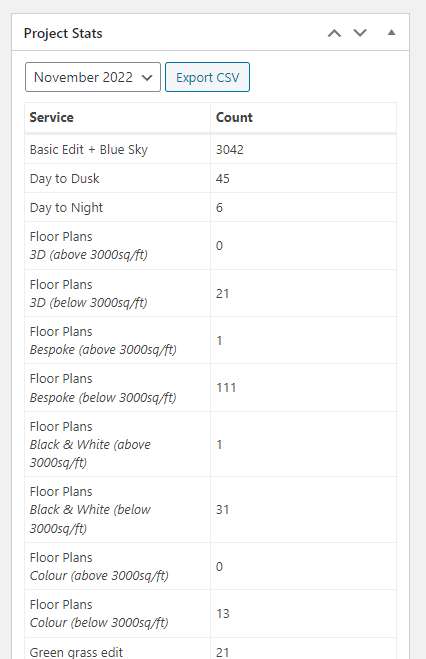
  3.  New project shows on the User’s dashboard, the Mod team’s dashboards and the Admin Dashboard.
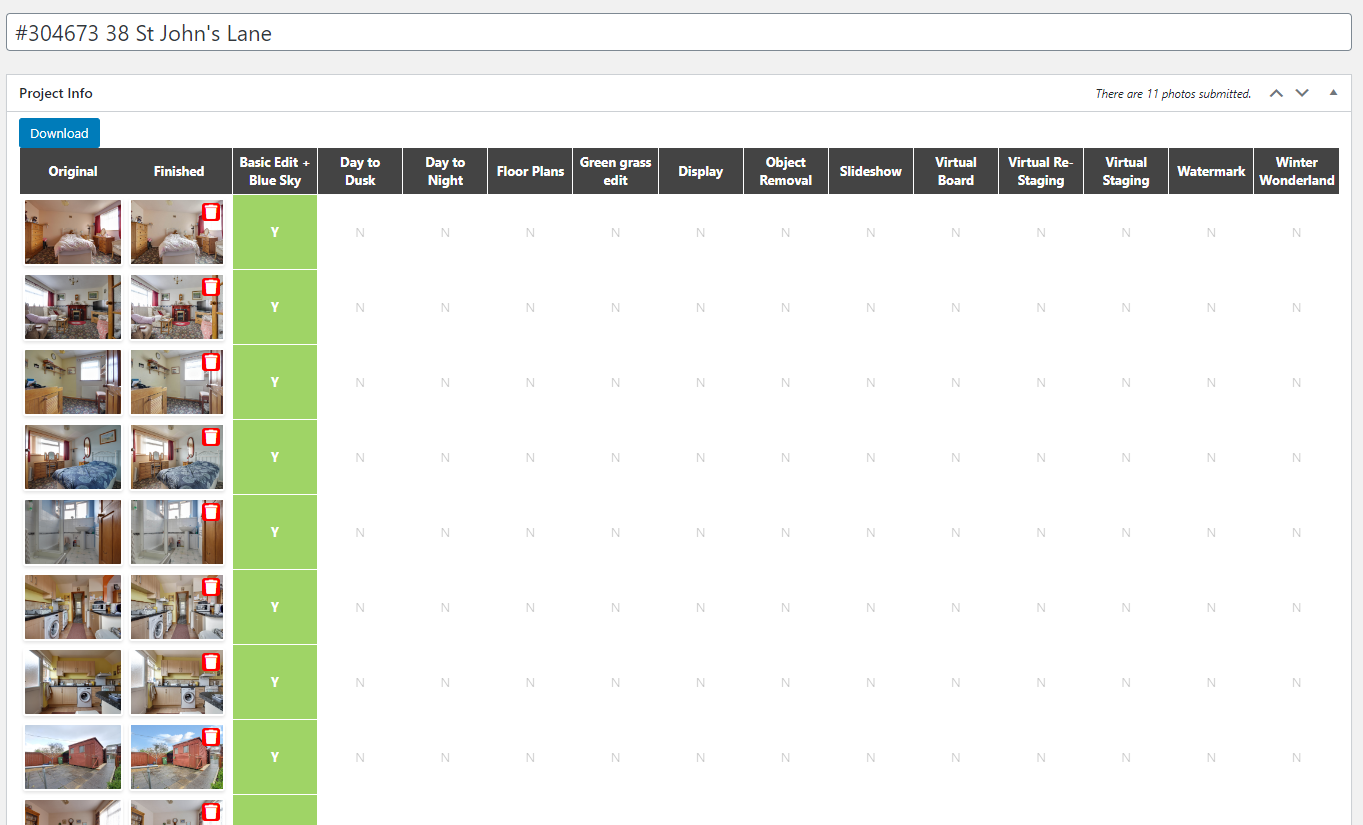
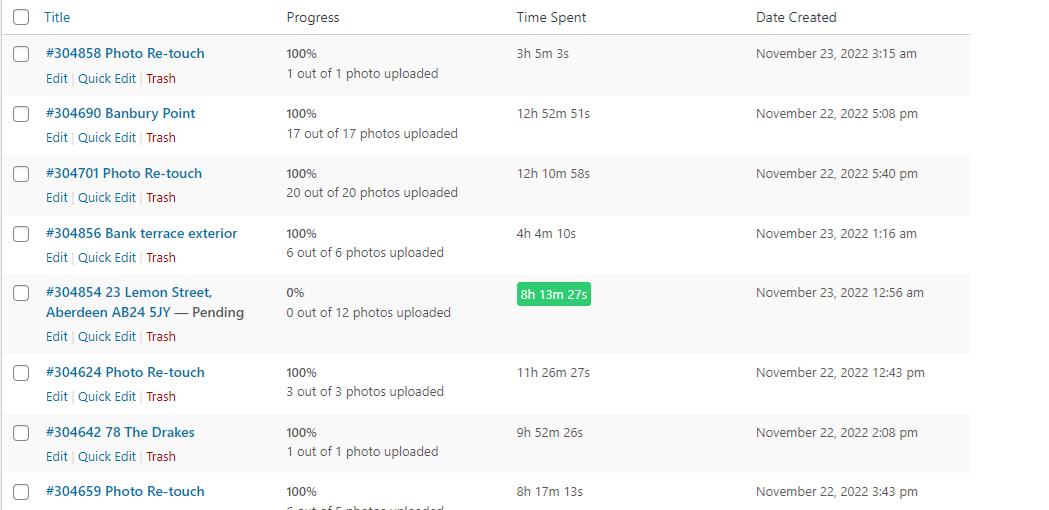
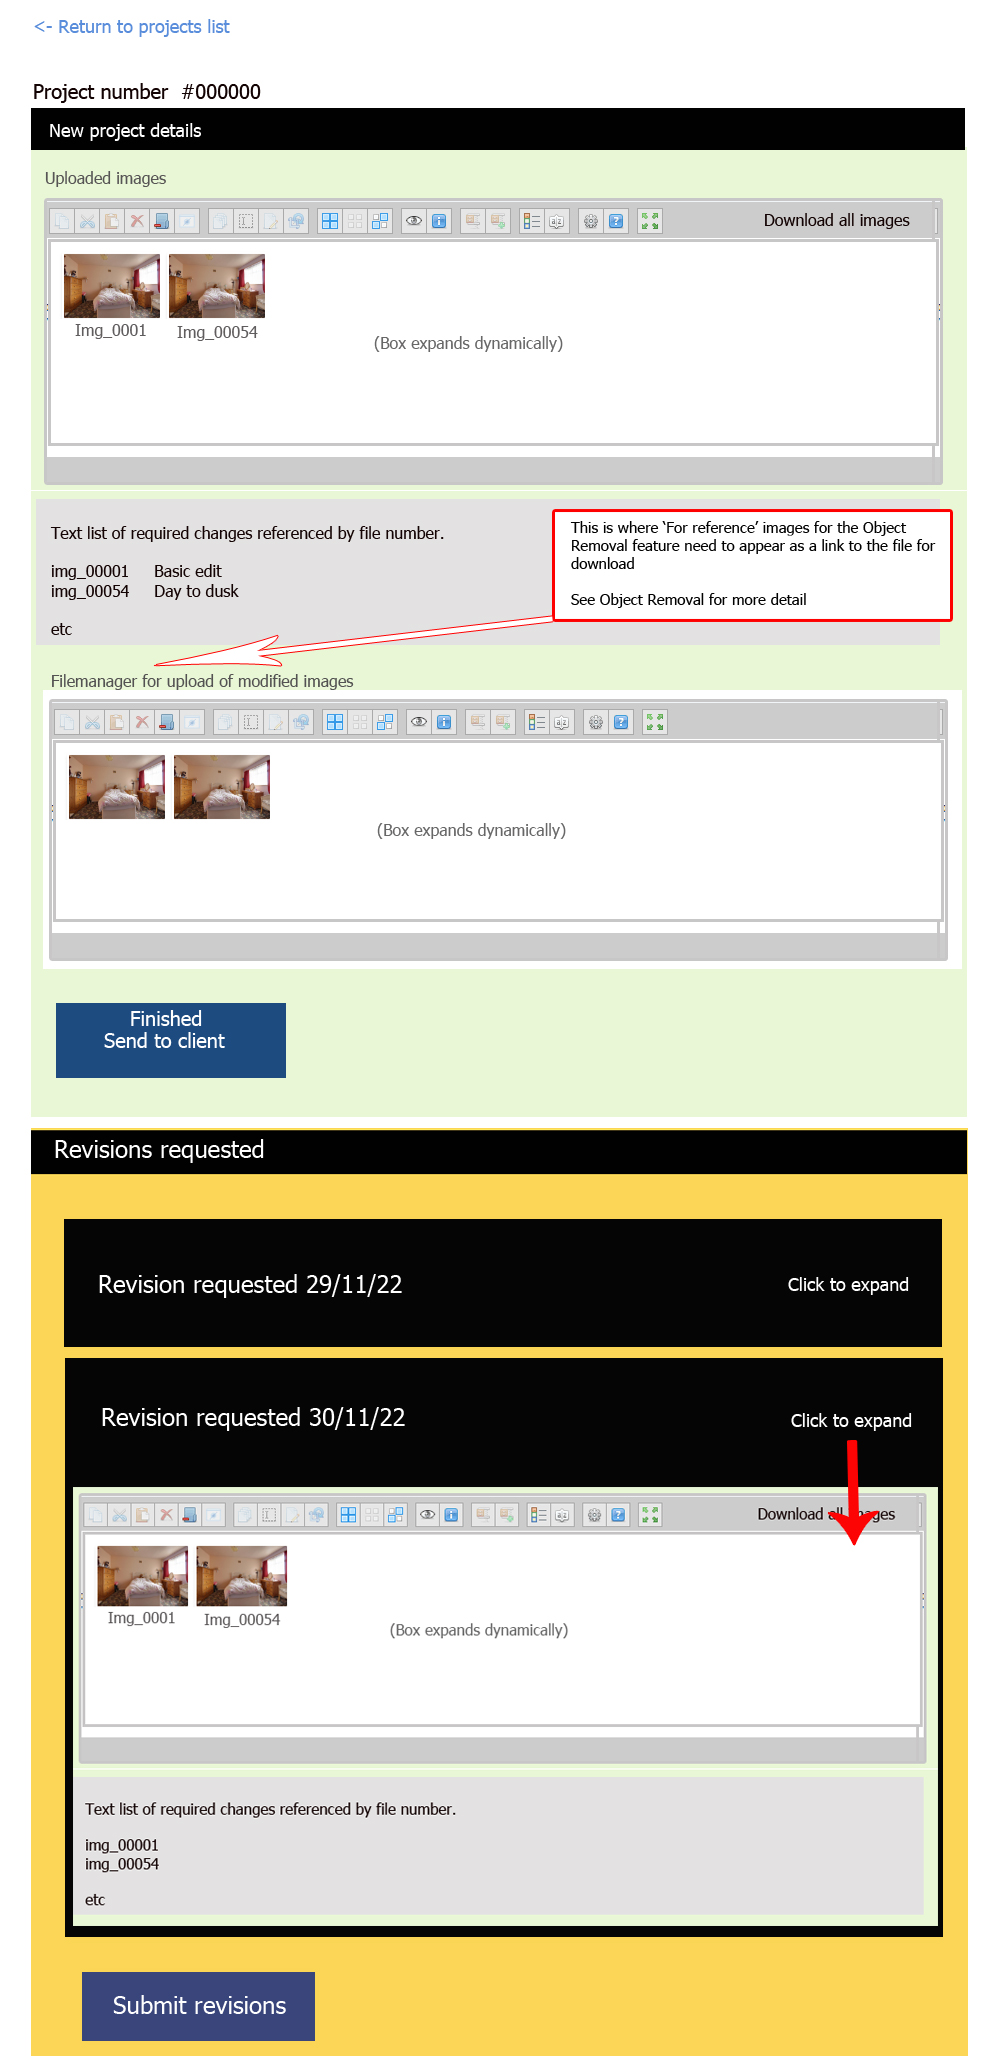
  4.  Images downloaded by the mod teams from their dashboards, modified and uploaded back to their dashboard
  5.  Since a project can be comprised of different elements going to different mod teams, the partially completed project is stored in ‘Holding area’; until project is complete
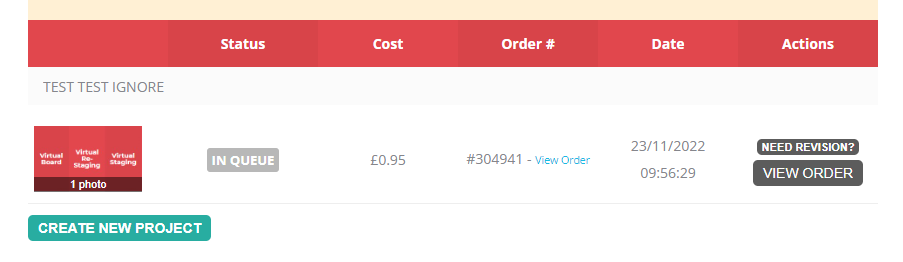
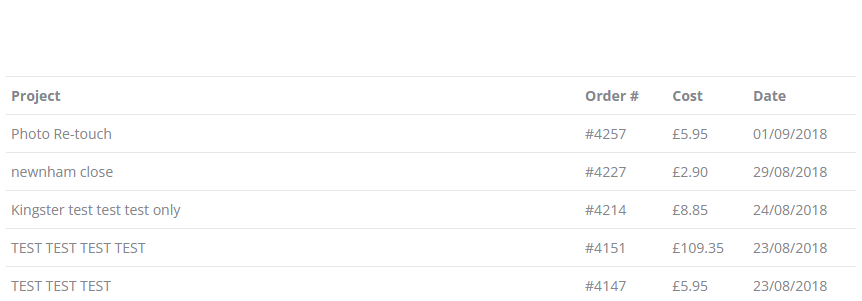
  6.  when completed, project becomes available for download in the ‘User Dashboard’ as in Zip format
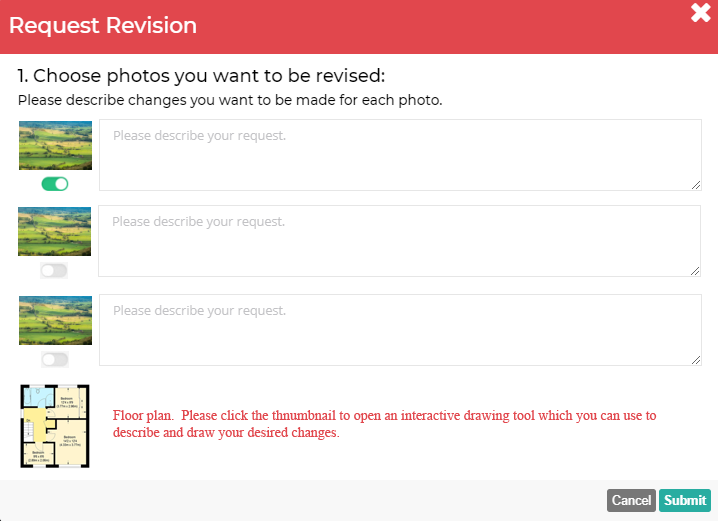
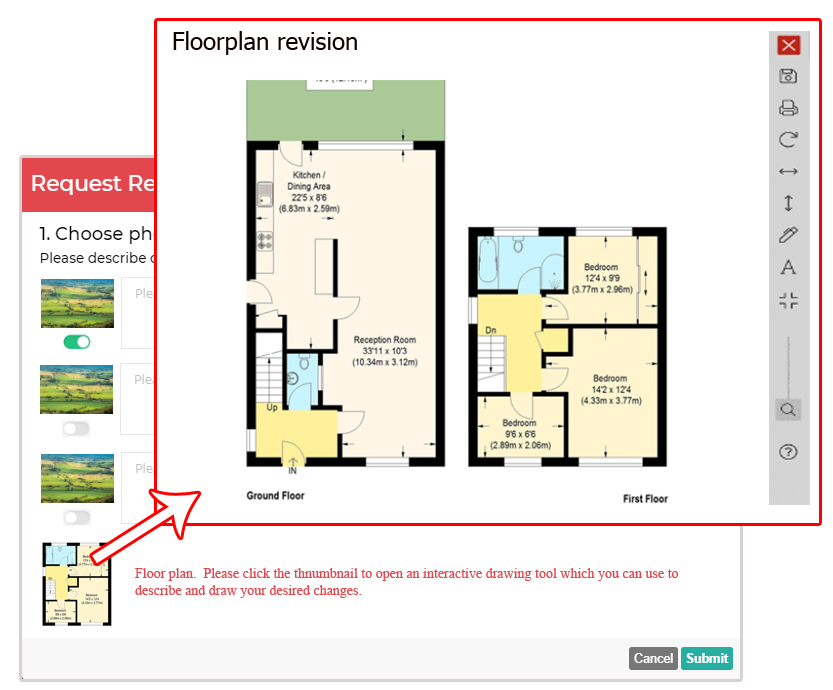
  7.  User dashboard includes photo/text notes upload interface in case of requirement for revisions including interactive drawing tool for Floorplan revisions
  8.  When revisions are required. the project is reopened and images uploaded the correct mod team dashboard, modified, then uploaded back to dashboard
  9.  Completed project again becomes available for download in the ‘User Dashboard’ in Zip format

Emails are sent when:

1)  Project is created  (To admin, User and relevant mod teams)
2)  Project parts are put together and completed project becomes available on the User dashboard  (To User and Admin)
3)  Project revisions are requested  (To admin, User and relevant mod teams)
4) Project revisions are completed (To admin and User)


Additional functionality

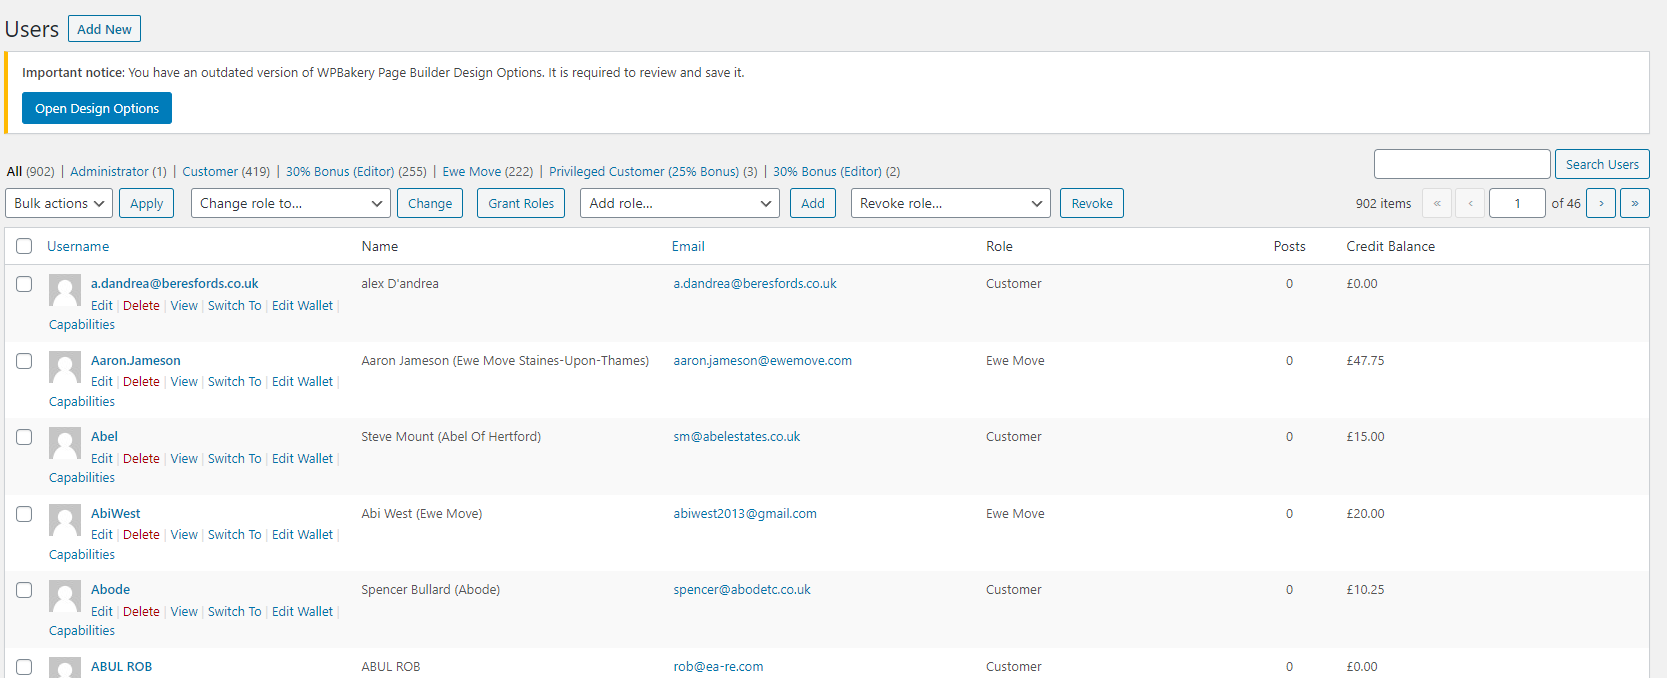
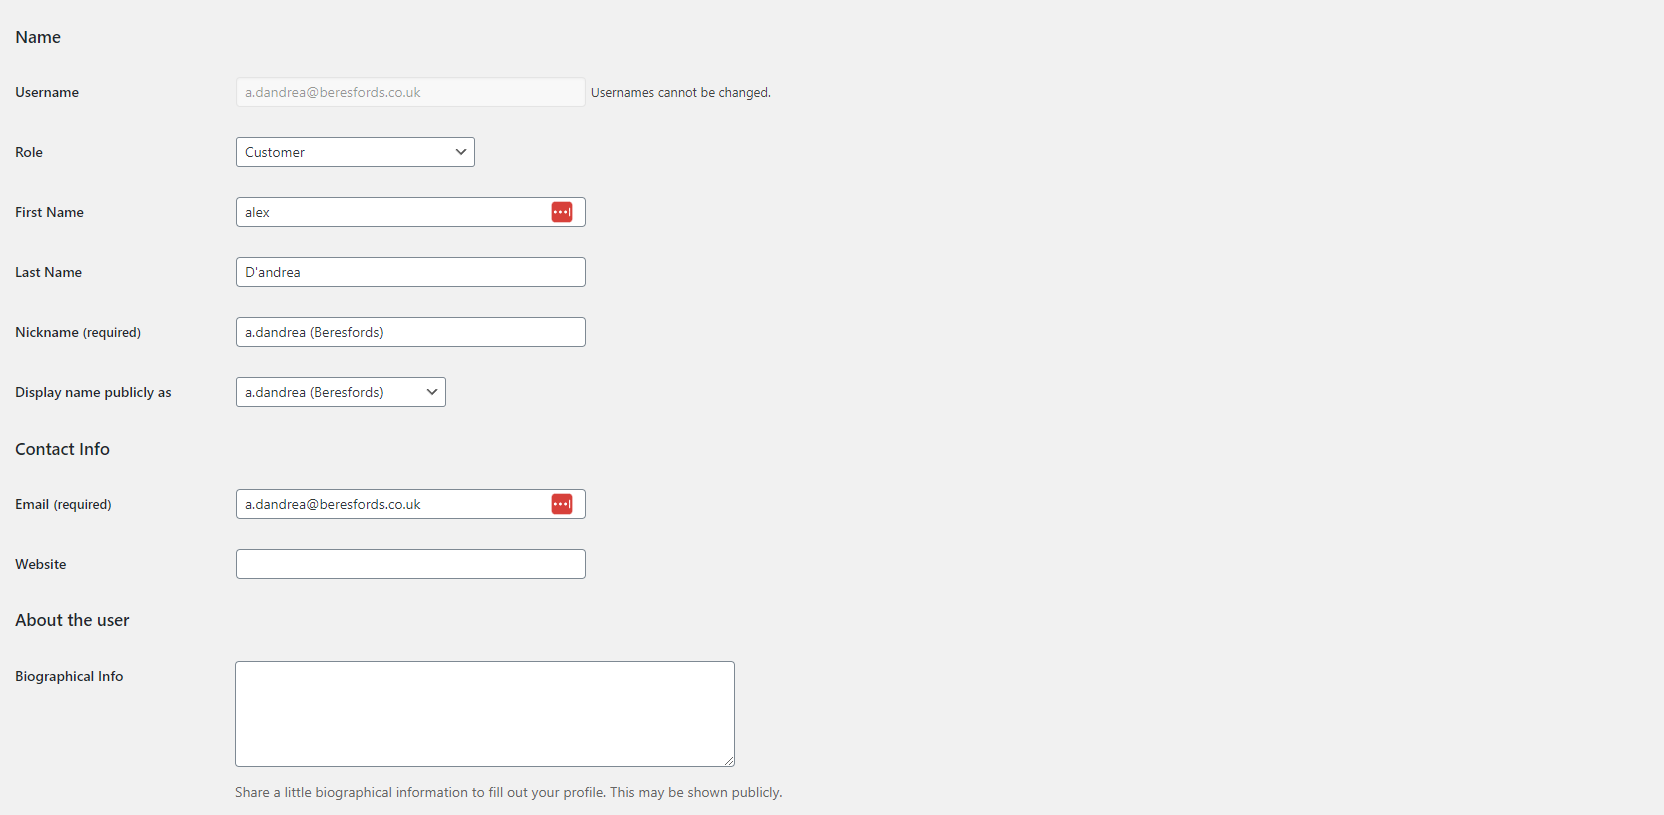
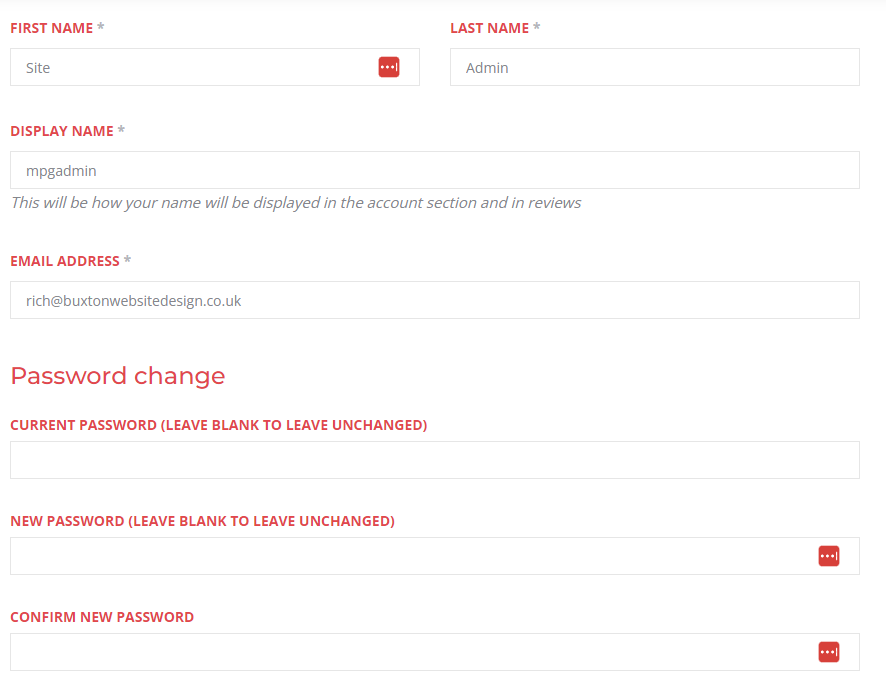
  • Certain user roles are awarded different levels of bonus credits when topping up their User Wallet.  This should be available in the User management part of the Admin dashboard
  • All projects are deleted from the system after 60 days to save server space but a text record remains in the User Dashboard.  Older projects to be stored in separate storage area, possibly a Dropbox account.
  • Floorplans, and ‘Standard’ images, Videos and Staging/Re-staging are sent to different Mod team dashboards.
  • Emails to the client to include the project name.

PART 1 – The user

  1. User project creation flow
  2. User Wallet top up
  3. Admin, User & Mod team Dashboard

1. User project creation flow

User project creation flow – Step 1.  Image and Video upload interface

User uploads their images and/or video.

To include:

  • Title area to create Project name
  • Click on dropzone to select files from local machine or drag files into dropzone.
  • Image shows Upload progress bar and then confirmation of successful upload, image file name, and size.
  • ‘Add funds to account’ button (links to to ‘Top up’ page where users can add credits to their User Wallet
  • ‘Select modifications’ button to move to Step 2

Image upload interface

Image upload interface with images uploaded

User project creation flow – Step 2.  Image Modification Selection interface

Left column of Mod selection table is populated with thumbnails of the uploaded images.

Videos are separated out and shown underneath the table in a separate upload file manager.  Should include the ability to drag and drop video thumbnails into the order required, deleted or new files uploaded,

User chooses the modifications for each image.

Screen shows real-time cost in the bottom right corner which increments on each choice, cost total includes any discounts for the user role.

Open the concertina sections for details on each modification

1 Basic Edit & Blue Sky

Simple on/off selector

Cost:  £0.95

2 Day to Dusk

On/off selector

  1. When selected, link appears (see screenshot 1)
  2. When link is clicked, popup window opens offering three images to choose from for the day to duck background (see screenshot 2)
  3. When image has been selected, thumbnail shows in the selection table  (see screenshot 3)

Cost: £5.95

Note:  If this option is chosen, it should not be possible to progress past the modification selection screen without choosing an image.

Screenshot 1

When selected, link appears for image choice, cannot progress beyond this screen without choosing image

Screenshot 2

On click, popup window offers three images  background choices

Screenshot 3

Thumbnail of chosen background image shows

3 Day to night

On/off selector

  1. When selected, link appears (see screenshot 1)
  2. When link is clicked, popup window opens offering three images to choose from for the day to duck background (see screenshot 2)
  3. When image has been selected, thumbnail shows in the selection table  (see screenshot 3)

Cost: £5.95

Note:  If this option is chosen, it should not be possible to progress past the modification selection screen without choosing an image.

Screenshot 1

When selected, link appears for image choice, cannot progress beyond this screen without choosing image

Screenshot 2

On click, popup window offers three images  background choices

Screenshot 3

Thumbnail of chosen background image shows

4 Floor Plans

On/Off selector

  1. On activation, offers a dropdown menu with the various types of floorplans available (Screenshot 1), prices below:
  2. Also, causes the appearance of an image upload dropzone to allow users to upload their own template to be used for the Floor plan.  (Screenshot 2)
  3. If the user has previously uploaded a Floorplan template(s) those images should stored on that user’s account and used to pre-populate that dropzone for selection.  (Screenshot 3)

Cost: 

3D (Above 3000 sq/ft)  £11.95

3D (Below 3000 sq/ft)  £8.95

Bespoke (Above 3000 sq/ft) £9.95

Bespoke (Below 3000 sq/ft) £6.95

Black and white (Above 3000 sq/ft) £8.95

Black and white (Below 3000 sq/ft) £5.95

Colour (Above 3000 sq/ft) £9.95

Colour (Below 3000 sq/ft) £6.95

Note:  If this option is chosen, it should not be possible to progress past the modification selection screen without choosing a Floorplan type and a template from the dropzone below the modification selection table.  Also, this option cannot be chosen if any other options has been chosen


Screenshot 1.  Floorplan type dropdown menu

Screenshot 2.  Floorplan template upload dropzone under the modification selection table

Screenshot 3.  Floorplan template upload dropzone prepopulated with stored template

5 Green Grass

Simple On/Off selector

Note:  Disables Basic Edit & Blue skies

6 Display

Display images are two images side by side, so the image selected needs to be paired with another image that has been uploaded.  (Screenshot 1)

This is achieved by clicking and dragging one of the other images that has been uploaded onto the text box shown in screenshot 1.  Doing this removes the second image from the main list of images.

A thumbnail of the chosen image shows (Screenshot 2)

Example Display image

Screenshot 1

Selecting display causes the text box/dropzone to appear

Screenshot 2

The image dragged from the left column appears in the dropzone and is removed from the left column

7 Object removal

On/Off selector –  activates a pop-up

Pop-up requires the user to describe the object(s) that need removing, using the text fields.

Hitting Return causes a new text box to appear, there is no limit to the number of text boxes.

Cost:

£3.50 per object (i.e. per text line)

8 Slideshow

On/Off Selector

Slideshow requires an address, selecting this option opens a text box.

Cost: £9.95


9 Virtual board

Simple On/Off selector

*Note –  one-off set up cost of £5.95 on the first order only

After the first time, the price is only £0.95

10 Virtual Staging & Re-staging

On/Off selector – activates a pop-up

Selecting this option opens a pop-up where the user choooses between tabs for Virtual staging or Virtual Re-staging.  User cannot select both.

Text box allows input of User instructions for the staging effect


Cost: £39.95

Note:  If this option is selected, the user cannot progress from the modification screen without entering a room description.

11 Renovations

On/Off selector – activates a pop-up

Selecting this option opens a pop-up , text box allows input of User instructions for the Renovations effect

Cost: (TBC)

12 Winter wonderland

On/off selector

User chooses to add winter wonderland effects to an image.

Cannot be chosen if Basic edit, green grass, day to dusk or day to night edits have been selected.

13 Video upload area

Any videos uploaded on the initial file uploads screen need to be shown here as a thumbnail that can be deleted which would delete that file from the upload.

There should also be an upload function to allow users to add to this section, and the files should be click and draggable so that the user can put them in the correct order to be spliced together.

The file name and the order of the video files is the information that needs to be passed to the mod team for splicing.

To progress to the next step, the user must have selected at least one modification per image.

User project creation flow – Step 3.  Order confirmation

The user is asked to confirm their order in the standard Woocommerce progression.

User project creation flow –  Step 4.  Payment

User has a choice of paying via Paypal or from credits in their User Wallet

2. USER WALLET TOP UPS

The ‘Top up your account’ button allows users to visit the ‘Top up’ page and add credits to their User Wallet.

Top-ups offer a bonus of from £1 to 25% depending on the amount added to the user account.


*NOTE It would be useful for the admin to have an easy way to give users discounts or extra credits both manually, and as a type of account

The Top up button

The top-up credit options

3. ADMIN, USER & MOD TEAM DASHBOARDS

ADMIN Dashboard

Admin dashboard menu:

  1.  Projects – table containing all projects, showing  columns in image below
  2. Users – User management  – replicate WordPress functionality
  3. Financial data – All user purchases to show – User – Date – Amount, and each transaction be a downloadable PDF.
  4. Stats – Shows summary of all edits and services user, by month   (See current WP dashboard for example)
  5. Logout

1. Projects

Two screens:

a)  Project list screen – clicking on a project name opens the Project Detail screen  (see screenshot)

b)  Project detail screen – Shows thumbnail of all uploaded images in a table of chosen edits (see screenshot)

Project list screen

*Time spent’ column shows time since project was created with green background, after 1 hour that becomes a red background.  Projects that have been reopened have an orange background.  Completed projects have no colour.

Project detail screen

(Need to add a ‘Send entire project to user’ button.)

2. Users

Two screens:

a)  User list screen – clicking on a user name opens the User account detail screen  (see screenshot)

b)  User account detail screen – Shows fields that currently exist on user account detail screen including extra functionality

User list screen

User account detail screen  

(To replicate the WordPress user detail screen including added functionality – list of user roles to be replaced with dropdown of bonus percentages – those need to override the normal ‘Top-up’ bonus amounts if selected)

3. Financial data

Like a Statement, showing User name, Date of transaction, amount.

Each transaction needs to be a downloadable PDF invoice.

4. Project stats

A simple summary of all edits chosen, filterable by month

4. Logout

USER Dashboard

User dashboard menu:

  1. Projects – list of projects – Project is a downloadable Zip folder.  Also has button to request revisions
  2. Deleted projects – Projects older than 60 days are moved to the storage space but show here as a text list
  3. Invoices – All the user’s transaction to show here and also be a downloadable PDF
  4. Account details – User’s personal details, change password etc
  5. Logout
  1. Projects

List of projects – Each entry shows Status, Cost, Order No, Date and Action columns.

Project is a downloadable Zip folder.  Also has button to request revisions

User Dashboard – requesting revisions

In the ‘MY ORDERS’ section of the User dashboard, all live projects for that specific user should show, along with a button called ‘Need revision?’

Selecting that opens a pop-up containing all images uploaded to a project on a lsit, selectable, and a text note field to the right.  Users select the desired image and add a text note to describe the changes.

Floorplans.

Selecting the floorplan thumbnail opens a second pop-up that is an interactive drawing tool, allowing the user to add drawn and text fields to the floorplan to describe desired changes.

Process flow

Submitting a revision request re-opens the project in the project page and the new files are uploaded to the mod team dashboard in the ‘Revisions’ field, along with text notes below.

When the mod team has done the revisions the images are uploaded back to the Revisions file manager field in the mod team dashboard and added back to the user’s dashboard and an emails sent to notify that the project is compete.

The User Dashboard – Revision request popup 

The User Dashboard – Floorplan Revision request popup – interactive drawing tool

2. Deleted Projects

Simple text list of deleted projects

3. User invoices

List of all the user’s transactions, each should be a downloadable PDF

4. User details

Standard user detail screen

4. Logout

Mod teams dashboard

General layout applies to all 3 mod team dashboards  (Standard edits team, Floorplans team, and Steve for Renovations, Virtual staging and re-staging.

Dashboard needs to show project No (clickable link to open Project detail screen), Progress (Number of images uploaded and then reuploaded), time spent (Uses traffic light colour coding system), Date created.

Mod team project list screen


Mod team Project detail screen

Green area shows new project, top file manager field shows files uploaded by the user, the bottom file manager field is where the mod team upload the modified images.
When revisions are submitted by the user the mod team receives an email and the revision request is added to the bottom of this screen in an expandable area